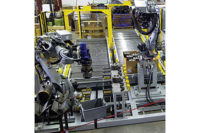
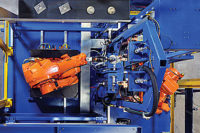
Flexibility is an increasingly high priority for many U.S. manufacturers, and the vision-guided robot has become a powerful tool to meet this demand. Vision-guided robotic (VGR) systems can be quickly adapted from one product to the next, facilitating new product introductions. VGR systems can enhance assembly, packaging, test and inspection processes, and they can perform in environments that are hazardous to humans.
Robots have been at the forefront of flexible automation for many years, but until recently robot vision was limited. In the past, vision systems required a PC with a custom frame grabber to capture or "grab" images from cameras, and custom software was needed to analyze the images. These systems were too complex for manufacturers to maintain with their own staff. Instead, vision experts had to be brought in to maintain the system and to create the sophisticated algorithms necessary for image analysis. This was very costly.
Now, all that has changed. What was formerly the art of integrating vision systems has been reduced almost to a science. Cost-effective vision systems are readily available, with greater accuracy and a much wider range of capabilities than earlier systems. Today's off-the-shelf software makes guiding robots with machine vision more practical. With user-friendly software, manufacturing engineers can make product changes, adjust tools and create new measurements without calling a vision consultant.
Today's VGR systems represent a good value for manufacturers, not only because the cost of robots and vision systems has decreased considerably, but also because the tools for both have vastly improved. Robot manufacturers now include high-powered vision algorithms with their software, in addition to standard measurement and object-recognition tools. Ethernet connections allow robots to communicate quickly with other robots, remote controllers and factory networks. Most robot controllers have built-in I/O modules with programmable logic, allowing them to control peripheral devices. This makes using a PLC or PC as the main controller optional.
Vision-tracking routines are available with some robots as an integrated package that includes both hardware and software. Cameras can be connected directly to the robot controller to enable on-the-fly picking of parts or products from moving conveyors.
We recently completed a packaging application that took full advantage of this tracking technology. Parts are fed in bulk from a hopper to a rotating tube with an internal spiral, which helps separate them. Further separation is created as the parts exit the tube and fall onto two cascading conveyors, the second of which is driven at a faster speed than the first. An encoder is connected to the drive shaft of the second conveyor to monitor its speed. This conveyor has a translucent belt. A light, mounted under a cutout in the conveyor bed, backlights the parts on the belt. A camera is mounted 4 feet above the conveyor and records the positions of the parts and their angular orientation as they pass over the light. Software in the robot controller calculates the paths and positions of all parts that could be picked by the robot. The robot follows available targets at the speed of the conveyor, picks a part, reorients it, and places it in the correct position in a packing box.
Of course, even with today's user-friendly vision technology, setting up a new system can still be challenging. For example, lighting in machine vision applications is still more art than science. Lighting trials done in labs rarely duplicate production environments. Moving parts, factory lighting, air quality, outside windows and skylights can adversely affect the performance of many vision applications. Engineers must ensure that once the lighting has been resolved, factory conditions will not affect a new system after installation.
Putting Vision to Work
In addition to software, vision hardware has also improved dramatically. More powerful microprocessors and higher-resolution CCD chips enable vision systems to measure parts with much greater accuracy than earlier technology. In fact, a recent application required the vision system to measure parts with an accuracy of ±0.02 inch.
The application involved finding machined grooves in steel blocks and controlling the pressing of metal tubes into those grooves. The camera needed to locate and measure multiple steel blocks placed randomly on a 3 foot by 4 foot magnetic chuck. Each block was 1 to 4 inches thick and had one to six grooves machined in it. The camera had to locate the beginning and end of each groove with an accuracy of 0.02 inch. The goal was to obtain data for six blocks in 30 seconds. A four-axis Cartesian robot would use this data to press the tubes into the grooves using a 5-ton servo press.
This application presented four major challenges:
- lighting.
- finding multiple grooves.
- correcting for parallax and distortion to achieve the 0.02-inch tolerance.
- correlating the vision data with the robot controller.
Lighting was critical because the machined plates and their grooves were precision ground with mirror-like finishes. Tests with various lights indicated that these reflective surfaces would create hot spots that washed out sections of the grooves as viewed by the camera. The hot spots were eliminated with indirect lighting onto matte-white walls. Light did not reflect directly back to the camera. By fine-tuning the aperture and shutter speed of the camera, we produced crisp images of the plates and their grooves.
Once the lighting and camera settings were optimized, care had to be taken to prevent factory lighting from affecting the images. Outside windows near the system created potential problems not only between day and night, but also due to the different positions of the sun throughout the year. Fully enclosing the camera and lights ensured the settings would not be disrupted by external light sources.
With the lighting defined, the next task was to find the grooves in the plates. The magnetic chuck was made of precision-ground steel and looked similar to the plates, making it difficult to distinguish between the two. An experienced vision consultant wrote custom software to find the grooves by analyzing the field of view. However, the program took hours to run and could find only partial grooves.
An in-house controls engineer solved this problem by creating arrows and attaching them to 3/4-inch diameter magnetic discs that were placed in front of the grooves. The camera was then programmed to search for the arrows and thus find the start of each groove. From there, the grooves were followed using edge tools included with the vision system. Groove-position data was taken every 0.05 inch. Then, using averaging and smoothing routines, the grooves were defined and displayed on the operator interface. Acquiring data for 24 separate grooves took less than 5 seconds. Groove data for each plate was stored on a hard disk to be used by the robot.
We were close, but we still needed to improve the system's accuracy to meet the 0.02-inch tolerance requirement. The high-resolution camera did not have sufficient pixel counts to measure an object with an accuracy of 0.02 inch over a 3 foot by 4 foot area. Parallax distortion was also a concern. To have zero parallax error, the camera would ideally be mounted infinitely far from the work. Experiments determined that a distance of 8 feet would give the best combination of lighting and viewing angle to minimize distortion and fit in a factory environment.
Even so, there was still a great deal of distortion due to the angle from center below the camera to the outside edges of the magnetic chuck. However, the high-end vision system had a new tool that made it possible to correct for parallax and lens distortion. Using a precision checkerboard grid that covered the magnetic chuck, calibration software automatically corrected the field of view for any distortion. The variable thicknesses of the plates created additional parallax, as the angles became greater when the plates were placed nearer the outside edges of the chuck. Based on the positions and heights of the grooved plates, offsets were added to yield precise points for the robot controller to use.
The groove data-points were sent to an array to guide the robot to follow each groove. The last challenge was to correlate the groove data to the robot coordinates. Using the calibration grid, the robot was moved to various points on the grid, and the X and Y coordinates were recorded. When a point varied slightly from the grid position, the robot was moved manually to align the press ram to the exact location on the grid. Offsets were recorded and a table was created of all the offsets. When the robot was commanded to go to a new position, these offsets were averaged and added to the groove data. This created a precise path for the robot and met the 0.02-inch tolerance requirement.
Camera Mounting
For robot guidance, machine vision cameras can be mounted to fixed positions in the cell, or they can be mounted directly to the end-of-arm tooling. The latter position enables the camera to view multiple locations while guiding the arm. This is useful when small objects need to be viewed over large areas, for inspection or to determine precise position. The vision tools correlate the arm's position with the field of view to specify the robot's next move.
In one such system, boxes of glass tubes are fed to an unload station. The boxes are tilted to 30 degrees to keep the tubes upright as they are removed from the boxes. Quick-change probe tools and selectable programs allow tubes of varying diameters and heights to be transferred at this station. The camera locates the ends of the glass tubes and guides the probes to engage them. Air pressure is channeled through the probes to expand their O-rings and grip the tubes. The robot then transfers the tubes to the assembly machine, where they are processed. This system addresses flexible production requirements, reduces breakage, cuts loading costs and minimizes glass-handling hazards.
As flexibility requirements increase, vision-guided robots are meeting the challenge. Robot manufacturers are providing stronger and faster arms, and software engineers are developing new capabilities and making existing tools easier to integrate. The next big challenge is to improve lighting techniques to keep pace with advancements in robotics and vision. Great strides have been made to accommodate variations in lighting, but it still remains an art. Even so, robotic vision systems are well-positioned to fulfill the needs of manufacturing in the years to come.

