Press fits are everywhere. According to Denny Lytle, product manager at BalTec Corp. (Canonsburg, PA), they're used in the tele-communications and computer industries, and in automobiles, airplanes, office equipment and consumer goods. But what exactly is a press fit?
Press fitting refers to two parts being pressed together and making an interference fit. An interference fit occurs when the inner diameter of the hole is slightly less than the outer diameter of the part being inserted. When the two parts are pushed together, they stick. According to Paul Bussman, industrial products manager for Kistler Instrument Corp. (Amherst, NY), "Press fitting is a lower quality fitting process. However, once a press fit is in place, it's not going to come loose."
Why Use Press Fits?
The particular application dictates whether press fits or other fastening methods are used. According to Gary Anderson, manager of applications, and Kevin Hauter, sales engineering manager at Orbitform (Jackson, MI), press fits are sometimes used to get a complete alignment between two pieces. Press fits are also used to prevent bearings from spinning. It is a good fastening method for components that undergo temperature fluctuations, such as automotive assemblies. Regardless of the temperature, the interference fit or force between the two parts is always there. The problem of temperature-related stresses that tend to crack solder joints is eliminated.Press fitting is also a less expensive fastening option. As Dan Baumann, president of Schmidt Feintechnik Corp. (Cranberry Township, PA), states, "A method, such as welding, is an expensive process. Welding requires maintenance and the replacement of welding studs. With a press fit application, if there is a bearing or pin pressed into another component, you just deal with the two parts."
However, when using press fits, it's important to monitor the interference fit between the two parts. Through in-process monitoring, meeting the required quality parameters is assured. If the press fit meets those parameters, quality control will have been implemented at the moment that the component is assembled. "You get feedback that it is a good part. You don't have to do any further checking," Baumann points out.
In Process vs. Post Assembly
Post-assembly inspection of press-fit parts requires destructive testing. Either a torque, or push or pull load determines whether a bushing, pin, bearing, shaft or armature has been pressed into another component with the correct interference fit. Assemblies subjected to such tests have to be discarded, because the integrity of the joint has been compromised. Also, those post-assembly inspection procedures can only be applied on a random basis. They are not reliable, and they do not contribute to a manufacturer's effort to reduce overall manufacturing costs."Manufacturers are realizing the benefits of in-process monitoring of various pressing operations, in lieu of post-assembly inspection of already completed parts," says Baumann.
Direct integration of quality control into production processes is essential for many reasons, including product liability, functional safety and economic considerations. Integrated quality control is also essential in sealed assemblies. Subsequent testing is largely impossible without destroying the component.

Controlling the Pressing Process
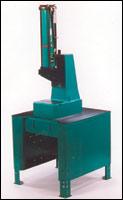
According to Dan Woodward, business director of ASG/Tyco (West Palm Beach, FL), there are three parameters to control during the pressing process. These parameters are force, speed and height (or stroke).The vast majority of presses in use today generate force by using pressurized air or oil, and a piston and cylinder arrangement. The output force is proportional to the input pressure times the cylinder area. Varying the pressure controls the force. A pressure sensor in the air or oil line usually provides feedback that can be translated into force. Force graphing, if implemented, is generally plotted as force vs. time.
Speed is proportional to the air or oil's flow rate into the cylinder. A flow control valve can provide speed control. Because the flow rate is proportional to pressure drops across the control valve, the speed slows as the pressure in the cylinder approaches line pressure. However, pressing speed is not monitored in most presses.
Up stops and down stops are set using a physical or hard stop. Sometimes, this hard stop is incorporated into the cylinder. At other times, it is part of the associated tooling. Intermediate or programmable stops are difficult to achieve in simple presses. Feedback on the final press height is usually not provided, because the press closes to a fixed height.
Historically, assembly presses have been designed as force-generating devices, with less regard to other parameters. In recent years, more attention has been paid to monitoring and controlling all aspects of the manufacturing process. Wide use of statistical process control (SPC) in industry requires data gathering and analysis to understand process trends. Equally important is the ability to influence the process to bring it in line with specifications. Consistent product quality requires a repeatable process. "A properly designed press can provide data gathering and feedback, automatic setup and control, process tracability, SPC analysis and the required process influence mechanisms," says Woodward.

Assuring Quality Control
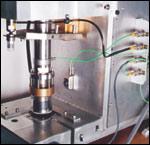
Two components comprise in-process quality control. To monitor force over distance, a load cell and either a linear transducer or electromagnetic transducer are used. A load cell can either be a strain gauge load cell or a piezo quartz load cell. Load cells convert a force to a voltage and are used to acquire the most control over the distance. Without the distance feature or data, the press fit load would be achieved, but not the distance. The load cell would simply acknowledge that a part went into another part at a certain fit. Whether it went in at the correct depth would be unknown.A linear transducer uses a glass component with increments that are visible by human eye but are electronically analyzed. This glass needs to be clear, clean and dust-free to read the increments. A more rugged and industrial friendly system is an electromagnetic transducer.
The data is taken from the load cell and transducer and combined to create a curve. Once a curve is created, or once qualified components are manufactured that meet the manufacturing and machining standards, curves are created for those components. With those curves, an average curve is established. Windows of parameters are established. Boxes are created that give the minimum and maximum loads over a specific distance. This is accomplished over the entire stroke length. The curve will then represent the total pressing force distance from the moment the load cell sees the force to the moment it is relieved of force.
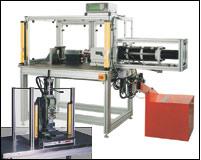
Although a measure of pressing control is achieved using traditional hydraulic and pneumatic presses, computer-controlled electric servomotor-based systems provide control and process feedback. Precise positioning and speed are inherent in servo-based motion control. Force feedback can be provided using either strain gauge or piezo-based load cells. Most modern electric presses take advantage of the versatility and cost-effectiveness of the personal computer (PC) for control. PCs provide a man-machine interface (MMI), program storage, data gathering and storage, and networking.
Servomotors are now available with high torque in a compact package. Brushless design makes them reliable and long lasting. These motors can be combined with a gearbox for further torque amplification. Large ballscrews are available for applications requiring high force.
Another important advantage of servo electric assembly presses compared with hydraulic and pneumatic presses is rigidity. The compressibility of air and oil combined with expansion of delivery hoses under high pressure causes the ram to exhibit characteristics similar to a spring. This spring effect can cause difficulties in controlling speed and positioning, particularly under varying force conditions.
For example, if a pin is pressed into a hole and the initial static force exceeds the sliding dynamic force, a sudden, uncontrolled movement may occur as the required force drops below the force available from the compressed fluid. This uncontrolled movement will continue until the excess force stored in the system is depleted. A servo electric-based press avoids this problem because the force delivery elements are not compressible and do not exhibit the fluid spring effect.

By monitoring force over the range of motion, insight into the dynamics of the process can be gained. For example, in a metal-to-metal press fit application, cold welding of the assembled components can be detected as a spike in the force-distance curve. For product traceability, the graphs are permanently stored with date, time, operator name, product name, serial number and any other relevant data.
To provide statistical process control, a representative force is captured for each cycle. Because many force readings are gathered during the pressing cycle, the user must select which force reading will be used for SPC X-bar and R charts. The choices are maximum force, minimum force, average force over a given stroke range, and instantaneous force at a given height. Alternatively, the height that corresponds with the maximum force--or any particular force reading--can be used for SPC. Once the SPC data is gathered, real-time process feedback can be automatically provided by the control computer. CPK calculations can show the process capability, while trends and control limit violations can warn before the product goes out of specification.
Process development is also aided by the data collection. By experimenting with different pressing parameters and correlating the force-distance curves with product integrity, the optimum press fit parameters may be discovered. The stored data can be reviewed at a later date to evaluate problems that are discovered in the field.
The technology required to eliminate the bad parts that escape traditional inspection methods is differential monitoring. Differential monitoring assumes that every assembly operation has a signature in terms of the forces required to produce the final product. Using a computer-control system to monitor the signature during the operation ensures that only parts that match the signature are accepted. While signature analysis has been used in production applications for more than a decade, differential monitoring--using signature analysis at its core--is new.
Where formerly it was enough to signal a good or bad part, in the future, additional information will be required from the production process for statistical evaluations and quality verification. "The automotive industry has said, 'We want you to verify and prove to us that you're in control of the bad parts--not the good parts. The good parts are assumed. The real value in the order is to prove to us that you're in control of the bad parts,'" says Larry Stockline, president of Promess (Brighton, MI). "'Cloning' is the ultimate goal of all quality assurance technologies. By cloning perfect assemblies, manufacturers can eliminate variations that lead to product failures, warranty claims and customer dissatisfaction. The average assembly system still produces from seven to 11 bad parts for every 35,000 good parts. And those bad parts pass all of the established quality tests and get into the field. A new approach to quality assurance is needed to reach the next plateau."
