Schneider Electric has been in operation for more than 170 years, evolving its product offerings from heavy equipment into electrical and automation management products. The company’s products and services cover electrical distribution, industrial automation, critical power and cooling, building management and security.
For many years, Schneider has focused on lean manufacturing. Rus Emerick, global process owner for 3D imaging at Schneider Electric, is also the company’s lean improvement specialist.
Emerick focuses on verifying assemblies before and during production using 3D data. He designs processes that can be methodically implemented in each Schneider plant around the world.
For 10 years, he has worked successfully with automated inspection in the production lines, using 3D scanners and in-spection software. About 3 years ago, Emerick started experimenting with computer tomography (CT) scanning—hoping to determine the root cause of assembly problems as a product came off the production line.
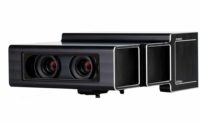
CT scanning became popular in medical procedures many years ago, but, in recent years, has become of interest in industrial processes. Emerick checked out and tested many systems before finding the Metrotom 1500 CT scanner made by Carl Zeiss and distributed by Laser Design Inc.
The Metrotom 1500 CT captures all surfaces, both external and internal, of complex free-form parts and assemblies without harming the object. Parts made of plastic, ceramics or composite materials—as well as magnesium, aluminum and steel—can be measured and efficiently evaluated.
The scanner can scan parts and assemblies up to 11.8 by 13.8 inches and features open X-ray tube technology to provide long service life. It can also be equipped with a higher resolution detector to make very fine part structures visible, and the enlarged detailed view can be measured with high accuracy.
“The CT scan has an accuracy of 11 microns and completes a scan in about an hour,” says Emerick. “We suddenly found that we could see, measure, compare and report on a product very quickly—without having to destroy it in the process.”
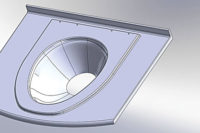
After obtaining the CT scan data, Emerick uploads and views it with Volume Graphics software. He then uploads a 3D model of the CT data (using Geomagic Qualify software made by Geomagic USA) and compares it to either original CAD design data or to scan data of another known working product.
Emerick likes Geomagic Qualify because it quickly and automatically measures and assesses deviations between the CT scan data and the comparison assembly model. It also makes measurements on known tolerances and identifies deviations in the assembly based on unanticipated forces between parts. The software produces custom reports in PDF format.
The rapid turnaround of CT scanning is important to Schneider, because its standard practice is to stop an assembly line whenever a problem arises. The company will not restart the line until the problem is resolved.
For example, a typical circuit breaker line produces 80,000 units per day in optimal conditions. If a line problem arises, Emerick says 3D scanning and inspection will enable the company to restart the line in an hour. Traditional destructive testing will cost the company 21 days of production in downtime and $480,000.
Emerick says CT scanning also reduces scrap and allows Schneider to see and identify cracks and bubbles inside materials that could reduce the life span of their products.
For more information on 3D scanners, call 800-327-9735 or visit www.zeiss.com. For more information on 3D inspection software, call 800-691-1839 or visit www.geomagic.com.
Verifying Assemblies Using 3D Scanning and Inspection

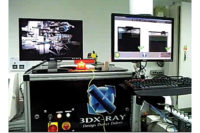
Rus Emerick, global process owner for 3D imaging at Schneider Electric, uploads a 3D model of CT scan data and compares it to either original CAD design data or to scan data of another known working product.
Photo courtesy Geomagic USA


