Turbines housed in aircraft engines are regularly subjected to very harsh conditions. For example, it’s common for them to be exposed to temperatures greater than 800 C for hours at a time—all the while needing to operate at 30,000 rpm.
Engine manufacturers know that each blade on a turbine must be completely defect-free to perform well flight after flight. Even the smallest surface defect can lessen turbine performance, increase maintenance costs and reduce engine life. To eliminate defects, each blade is very carefully inspected during manufacturing.
Until recently, one North American manufacturer inspected its blades manually. Highly trained inspectors measured hundreds of features and checked for surface defects at depths of thousandths of an inch.
Unfortunately, because manual inspection was time consuming and labor intensive, the manufacturer could only inspect a sampling of blades rather than each one. Another problem was inspection results varied significantly between inspectors.
To prevent these problems, the company asked Orus Integration Inc., based in Laval, Quebec, to design and build a cost-effective system that systematically inspects each blade and provides consistent, repeatable results. Orus calls the system the INL-1900x2T.
Self-contained, the system features separate metrology and surface-defect stations where inspection is performed. A six-axis Fanuc LR Mate 200iC robot serves both stations. The system also is equipped with an Omron PLC, six Basler GigE cameras and a display monitor.
Within the metrology station are two high-resolution cameras and a 4-inch granite slab to absorb heat and vibrations. The surface station has one high-resolution and three low-resolution cameras, along with two diffuse on-axis lights and a diffuse backlight.
According to Louis Dicaire, project manager for Orus, the INL-1900x2T performs three types of inspection. First, it verifies the measurement of several hundred blade features. Second, it inspects both sides of the blade and other critical surfaces for defects. Finally, it validates the part’s character markings. Cycle time is 15 seconds.
A batch of blades are placed on a carousel to begin the process. The robot lifts a blade and places it on the granite slab in the metrology station. There the part is illuminated by two collimated LED blue lights and rotated so the high-resolution cameras (each equipped with a telecentric lens) acquire many images at high speed.
At this point, Matrox Imaging Library 9 software matches an image of the specific blade to the original CAD drawing and makes it the reference image. The software then measures up to 50 tolerances and several hundred features of the blade, including parallelism, length, radius and angles.
Next, the robot places the blade in a three-pronged gripper mounted in the surface-defect station. As the blade rotates 360 degrees, all four cameras take images of both part sides. After analyzing these images for surface defects, the software verifies the part’s character markings.
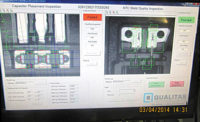
When inspections are complete, all results are logged and data is available for reporting. If a part passes all inspections, the robot puts it in a good parts chute. A part that fails any inspection is held in the gripper long enough for information to display on the monitor and tell the operator what needs to be corrected on the part. It is then returned to the operator via a reject chute.
“This [system] uses an array of field-proven robot, axis and vision technology [that can] adapt to the client’s future needs,” says Dicaire. “This project is probably where we dug deepest inside the [image] library.”
For more information on image-analysis software, call 800-804-6243 or visit www.matrox.com/imaging.


