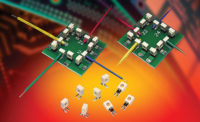
Among Huber+Suhner’s most popular products are high-frequency connectors that transmit analogue and digital signals in a frequency range from 3 megahertz to 300 gigahertz. The company makes both standard and custom connectors, which are assembled manually.
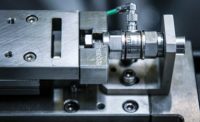
During assembly, the worker uses a mounting tool to push an insulation sleeve onto the inner portion of the conductor. However, because the conductor is structurally asymmetrical, there is a chance the sleeve will be inserted backwards into the mounting tool.
To ensure correct assembly, Huber+Suhner monitors the mounting process with a Type 5867A maXYmos BL monitor from Kistler Corp. The monitor creates a force curve of the mounting process and then compares it to a known-good curve. If the force curve deviates from the standard, the monitor flashes a red “Not OK” warning to indicate the insulation sleeve has been inserted incorrectly. If the two curves match, a green light flashes indicating the sleeve has been inserted correctly.
Thus far, the monitor has helped Huber+Suhner produce more than 100,000 zero-defect connectors. The company selected the monitor because it is cost-effective and easy to set up.
The monitor uses potentiometers to measure the X axis and piezoelectric or strain gauge sensors to measure the Y axis. It also features an intuitive user interface and an extensive curve memory.
The monitor offers five evaluation objects (envelope, box, line X, line Y, and no pass) to determine if a force curve is good or bad. It also supports 16 individual measurement programs and unique part types; 8,000 pairs of X and Y values per curve; and three real-time outputs for X and Y thresholds.
Engineers can locate the force curve of a bad part by scrolling through the monitor’s curve memory or displaying an entire batch of curves. The shape and congruence of the curves allow the user to deduce the cause of each reject.
The part also can be traced through a serial number generated by either the PLC or the monitor. Test reports are linked with this serial number and filed in selectable target folders. Another helpful feature is automatic trend tracking, which enables manufacturers to track set-point limits and adjust the evaluation function to suit the current process.
For more information on force-displacement monitors, call 888-547-8537 or visit www.kistler.com.


