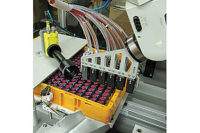
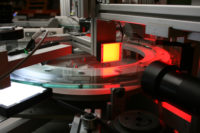
Machine vision systems rely on high-quality images to provide accurate, reliable and repeatable part inspection. The best way to obtain these images is to optimize the lighting of the part being inspected.
Optimal lighting maximizes feature contrast so the camera can easily locate a specific shape, mark or surface feature. Poor lighting produces uneven illumination of the part, increasing processing time.
Many factors must be considered to achieve optimal lighting. These include the color, angle, type and amount of light needed; part size, surface features and geometry; if the part is moving or stationary; and the size of inspection area to be lighted. The vision system’s capabilities and the manufacturer’s specific production requirements also must be considered.
Our Nerlite lighting series can be used in a wide range of part-inspection applications. The following tips offer manufacturers eight ways to use this lighting to optimize vision system performance.
Tip 1: Bright Lights
A vision system can detect missing material in a part. The system also can detect when an insufficient quantity of material has been injected into a mold. This condition, known as a short shot, produces parts with unsealed surfaces.
Application: Detecting Short-Shot Plastic Bottles.
A plastic-bottle manufacturer had trouble detecting short shots, which were causing customer complaints. To better detect short shots, the manufacturer now uses a Nerlite DOAL (diffuse on-axis light) illuminator.
On a good bottle, the DOAL reflects brightly off the flat sealing surface and presents the camera with a well-defined bright annular area. In contrast, the short-shot bottle’s flat specular surface scatters light away from the camera, creating dark areas.
Tip 2: The Right Wavelength
Electronics manufacturers often use machine vision to ensure that components are correctly oriented on a printed circuit board during assembly. One such component is the integrated circuit (IC) chip.
A correctly oriented chip should lie on the board copper side down to ensure proper electrical connection. However, the chips frequently get flipped during automated assembly, resulting in the silver side being face down. This orientation causes component and assembly failure.
Application: Identifying Flipped ICs.
To identify assemblies with flipped ICs, one manufacturer uses the Nerlite DOAL illuminator. The DOAL uses blue light (460-nanometer wavelength) to sharply differentiate the copper and silver surfaces.
Copper surfaces absorb the blue light and appear dark, while silver reflects the blue light and appears bright. The sharp difference in contrast is quickly recognized by the machine vision system, enabling real-time process corrections.
The DOAL also uses coaxial lighting geometry to eliminate the root causes of false rejects: unwanted glare, reflections and dark spots.
Tip 3: Nondiffused Light
Tiny cracks in transparent material, such as glass, can be very hard to see close-up. Imagine how much harder they are to see in thousands of glass containers as they move past you on a conveyor during manufacturing and handling.
Food processors face this challenge daily—knowing full well that the cracks must be detected prior to filling and shipping. Failure to do so can lead to increased waste, returns and consumer complaints.
Application: Detecting Cracks in Glass Containers.
To detect cracks during side-wall inspection of glass containers, one processor uses a Nerlite area array. The nondiffused array directs light rays at the transparent bottle from a dark-field region, which is outside the camera’s field of view.
Most of the rays pass through the transparent object undetected by the camera. However, some light rays refract and reflect off cracks in the glass. The resulting image shows a bright feature (the defect) on a dark background.
Tip 4: Diffuse Light
Detecting missing, damaged and or incorrect contents in the cells of a blister package helps drug manufacturers ensure the quality of pharmaceutical goods.
|
Eight Tips for Optimal Lighting Proper lighting is critical to the success of a machine vision application, and should be the first consideration when setting up a system. Well-planned lighting will result in better system performance and save time, effort and money in the long run. Here are eight tips for optimal lighting:
lighting, call 800-762-1149 or visit www.microscan.com. |
However, illuminating the package so no reflections from cell coverings are present during inspection can be a tough challenge.
Unidirectional, or single-plane, light sources can cause reflections and shadows. Diffuse light, on the other hand, provides light rays to the object from a multitude of angles. Such lighting removes glare by de-emphasizing surface textures and changes in elevation.
Application: Verifying Contents of a Blister Package.
One drug manufacturer uses a Nerlite CDI (cloudy day illuminator) light to detect cell contents by their shape or color. Diffuse lighting from the CDI’s LEDs bathes the package in uniform white light from every angle. The resulting image shows a glare-free package with clear cell coverings and a high-contrast, neutral color view of the cell contents.
Tip 5: Color Creates Contrast
All applications require the creation of high-contrast images. A useful method for creating such images is to illuminate the object with colored light. A light’s wavelength can make color features on the part appear either bright or dark to a monochrome camera.
Using the color wheel as a reference, choose light of an opposing color to make features dark. Choose light of the same color to make features light. For example, a green light can be used to make a red feature appear darker or a green feature appear lighter.
Application: Verifying Print on Aluminum Jar Caps.
One manufacturer needed to confirm the presence of red, ink-jetted date codes on jar caps with blue printed graphics. The company had tried using standard red light, but it caused low contrast on the red text and could not be visually distinguished from the product graphics. However, blue light made the blue text disappear and the red text stand out.
Tip 6: Strobed Light
When parts are moving on a high-speed production line and must be inspected in motion, a strobed light should be used to ensure accurate inspection. Using a non-strobe light in such applications can result in blurred images.
The strobe light must be set at the proper pulse duration, in microseconds, to produce clear images. The duration of the strobe pulse is the time it takes the image of the part to travel a distance represented by the width of one pixel across the sensor. If the strobe is flashed for this duration, the image will exhibit a blur of 1 pixel, which is acceptable for most applications.
The formula to determine strobe pulse duration is as follows: (field of view/pixels)/part speed.
As an example, let’s assume the field of view is 1 inch with a 640-pixel frame, and the part speed is 48 ips. The calculation becomes (1 inch/640 pixels)/48 ips = 0.0000325 second. Thus, a strobe pulse width of 32 microseconds is needed.
Tip 7: Eliminate Ambient Light
Machine vision systems rely on transitions of gray levels in a digital image. In many vision applications, ambient light sources, such as overhead room lighting, contribute unwanted bright reflections that make it difficult or impossible for the vision system to detect the features of interest.
|
Five Questions to Answer Before Choosing Lighting The better the lighting, the better a machine vision system will perform. Here are five questions manufacturers should ask to make sure they choose the best lighting for each application.
|
This can be corrected by using light that is brighter than ambient light, or by shrouding the application to keep out ambient light. An infrared light source can also eliminate this problem.
Application: Verifying Precise Measurements of Caps.
Verifying precise cap diameters was an ongoing challenge for one manufacturer. The problem was that daylight and overhead lighting created reflections on the caps, resulting in inaccurate measurements.
By controlling the lighting, the manufacturer made sure that the vision
system camera only sees what is specified by the application, avoiding reflections and inaccurate measurements.
Tip 8: Infrared Light
Infrared light can also be used to diminish the gray-scale difference between colored objects. Dark objects absorb infrared light waves, thereby creating uniformity in objects of otherwise varying shades. This lighting solution facilitates detection of inconsistencies where color or shade variation is expected and should not affect inspection.
Application: Counting Multicolored Parts to Verify Assembly.
An electronics manufacturer needed to ensure proper assembly of a product by counting multicolored buttons that are placed onto a dark background. Initially white light was used, but it made some colors invisible against the dark background, causing them to be missed by the camera. Infrared lighting was then used.
It made color variations go away and enabled the vision system camera to clearly see and accurately count the buttons.


