Designing an automated, inline system to perform final quality inspection of a large or complicated assembly can be tricky. Each individual machine vision task can be handled easily enough, but there are often complicating factors.
For example, a single vision sensor may lack the pixel resolution to capture all the features of the assembly, or the application may require inspections to be made at various locations on the assembly. In either case, the system would need multiple cameras, and that means more space and a more challenging integration project. To further complicate matters, the system is typically called upon to inspect multiple SKUs on the same line.
The Cross Co. Automation Group recently developed a unique way to handle all these challenges.
Based in Belmont, NC, the systems integrator helps manufacturers increase productivity and efficiency by solving problems related to automation, pneumatic and mechanical assemblies, robotics, electronic motion control products, data acquisition and data management.
This past spring, the group developed a turnkey automated system for final inspection of large assemblies, such as automotive engines or electronic subassemblies. Featuring a Universal Robots UR5 robotic arm guided by a Microscan Inc. Vision HAWK smart camera, the system is especially well-suited for applications requiring three-dimensional, multipoint part inspection.
The system requires only one smart camera, which communicates data to the robot as it moves to the required inspection points on all sides of the part. This state-of-the-art technology ensures safe, reliable and easy inline inspection.
Upon entering the system, the part is secured in place and its SKU photographed by the camera. After a brief pause, the camera calls up the inspection program for the SKU. This program tells the robotic arm where to position the camera to take images of the part for inspection.
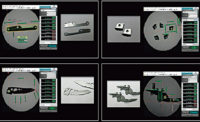
Each time the arm moves into position, it sends a command to the camera sensor to take a picture. As the camera processes and analyzes each image, its CloudLink interface displays inspection results in real time on an HMI. Once inspection is complete, the HMI displays “GO” or “NO GO” to indicate if the part has passed or failed inspection. Real-time results may be displayed on a wireless tablet or smartphone using a Web browser.
Manufacturers especially like that the system automates quality control without needing to shut down the assembly line. The system’s base can also be equipped with rollers to easily move it anywhere within a manufacturing facility.
A model of the system was demonstrated at the Automate 2015 show this past March. There, the system performed two inspections of an engine assembly built for a weed cutter. The system confirmed the presence of a cap on the gasoline tank and verified that the choke lever was in the proper position
Part of Microscan’s AutoVISION series, the Vision HAWK features advanced optics, liquid lens autofocus and LED lighting. It integrates easily into equipment via RS-232 or Ethernet connections, and communicates over serial, Ethernet TCP/IP, EtherNet/IP and Profinet I/O protocols.
The UR5 features force control technology that measures electrical current in the joints to determine force and movement. It is lightweight and designed to work alongside people without any safety shielding.
For more information on smart cameras, call 800-762-1149 or visit www.microscan.com. For more information on force-control robotic arms, call 631-610-9664 or visit www.universal-robots.com.


