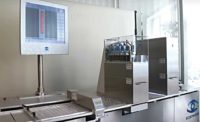
Family-owned Altman Manufacturing Co. Inc. has built tool-and-die-cutting, fabrication and automation equipment since 1942 at its plant in Lisle, IL. Customers use the equipment to produce rubber and plastic goods that do not have a defined geometry.
About three years ago, a customer asked Altman Manufacturing to develop an automated machine with a vision inspection system. The customer wanted to replace its time- and labor-intensive manual inspection system. Workers sat at tables and checked small parts as they moved down a conveyor. Some parts were less than 1 inch in diameter.
Paul Altman Jr., lead engineer at Altman, notes that the most efficient worker in this system was only 87 percent effective. Also, because the manual process was tedious, worker effectiveness often diminished in the last hours of each shift.
The customer wanted an automated system flexible enough to inspect current and future parts of various sizes, shapes and colors. Initially, the system would be used to inspect three medical-device parts (seal, O- ring and filter) that are made of rubber, but different in size, shape and color.
Although Altman Manufacturing has worked with numerous suppliers of vision-inspection systems, the company felt a Teledyne DALSA system would be best for this application. Paul Altman then worked with the supplier to develop a preproduction vision system that allows Altman to view different parts and design appropriate lighting to ensure the cameras deliver optimum results.
“We use this [preproduction system] to illustrate how a product could be inspected,” explains Altman. “In production, it points to the defect, describes how it was found and the algorithm we used, and explains how a defective part would be sorted. Customers understand in advance what a vision system will do and how it will work so there are no future requests for inspections beyond the machine’s capabilities.”
Vision system components include a GEVA Vision appliance, eight Genie 1600 high-resolution cameras and iNspect vision application software. The system is setup so that each part receives specific lighting schemes during inspection. For example, one part may require an overhead light, while another may need to be lit from below, and a third may require a dark-field inspection.
Each part is also associated with a particular field of view. Thus, one part may be inspected with cameras one, two, and three, but a second part may be inspected with cameras one, four and six. Cameras are setup so that no elaborate focus techniques are required.
During production, each part is placed on a moving conveyor. After a few seconds, the part enters the inspection station, where it passes over a lighted glass disk and is photographed. Images are instantaneously analyzed by iNspect software. Any part that doesn’t meet preset requirements is discarded.
“Our customer inspects more than 100,000 of the same type of part in each run and transitions seamlessly from part to part, inspecting as many as 20 different parts in a day,” says Altman. “The machine can inspect three parts per second with 99.97 percent accuracy. That’s a rate of speed and accuracy that was unimaginable before [automated inspection].”
For more information on vision systems, call 978-670-2000 or visit www.teledynedalsa.com.


