Part of the Bosch Group since 1951, Bosch India Ltd. is India’s largest manufacturer of automotive components, such as fuel injection systems, electronics and aftermarket products. The company also makes specialty and packaging machines, electric power tools and security systems.
Until recently, the company relied on manual inspection to ensure the quality of many auto parts. For example, inspection of manifold absolute pressure (MAP) sensors involved workers using a visual measurement system to verify capacitor placement, and determine the quality of welded sensor leads based on the surface’s negative temperature coefficient.
The main problem with this approach was it took much too long—up to seven minutes per part, according to Harish Babu, senior manager for Bosch India. In addition, the process required extensive worker training and was completed at two workstations, resulting in workers losing more time walking back and forth between locations.
To quicken inspection, the company hired Qualitas Technologies to develop a vision-based system. Qualitas has built many such systems for manufacturers in the automotive, pharmaceutical, food and beverage, printing and consumer goods industries.
“The measurement accuracies we demanded were very high,” notes Babu. “Although Qualitas provided sufficient demonstrations and feasibility reports, we weren’t sure our accuracies could be achieved.”
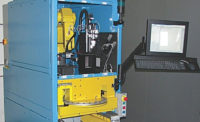
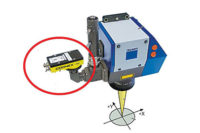
The inspection system features two five-megapixel cameras, each of which is located above a rotary indexing table. Each camera is equipped with a 12-millimeter telecentric lenses and a blue diffuse-on-axis light for illumination. Both tables are located in a workstation monitored by a single operator.
After the operator places MAP sensors on the first table, camera one takes an image of each component as it is indexed. These images are streamed to a high-speed desktop PC and immediately analyzed by Sherlock software (made by Teledyne DALSA). The software checks to verify the presence and accurate placement of capacitors. All sensors with missing capacitors are discarded.
Remaining sensors are then placed on the second table and photographed by camera two. These images are streamed to the PC and immediately analyzed to ensure weld quality of sensor leads. All sensors with poor welds are discarded. Sensors that pass both inspections are sent to shipping for delivery.
Sherlock software features moveable and resizeable windows that display inspection analysis in real time. It also features built-in editing and debug tools, and instruction bars that allow quick access to program functions.
The vision system performs either MAP sensor inspection process in about 300 milliseconds and is accurate to within 10 microns. Babu says Bosch India is so impressed with the system’s speed and accuracy, the company plans to implement comparable vision systems on all new production lines going forward.
For more information on image-analysis software, call 519-886-6000 or visit www.teledynedalsa.com.


