Based in New Hudson, MI, Pratt & Miller (PM) is a world-class engineering company that turns its clients’ automotive concepts into reality. The 26-year-old company does this by relying on cutting-edge engineering, manufacturing and tooling.
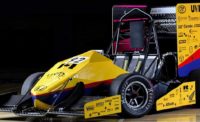
One of its most well-known clients is General Motors, which chose PM to build a new racing car and team to participate in the 1999 grand touring races. PM developed the Chevrolet Corvette C5-R, a vehicle based on the C5 generation of the Chevrolet Corvette sports car but designed purely for motor sports. The Corvette Racing team’s latest car, introduced in 2014, is the C7-R.
Over the past 16 years, the team has won 91 races worldwide, including 84 in North America: 82 in the American Le Mans Series, one in Grand-Am and one in the new Tudor United SportsCar Championship. Internationally, the team has eight class victories in the 24 Hours of Le Mans since 2001.
For Corvette Racing and all of its automotive customers, PM engineers carefully design and measure each vehicle part to ensure accuracy and optimize performance. As needed, the engineers fabricate parts or use reverse engineering to improve part design. They also verify the measurement accuracy of complicated bodywork, surface features and interiors.
Until a few years ago, engineers did all measuring with standard hand tools, such as gauges, calipers and micrometers. Besides being time consuming, the tools occasionally produced inaccurate measurements due to human error. More importantly, the tools tended to scratch or damage complicated parts and free-form surfaces—forcing PM to farm out this work and lose direct control of the data.
The company began searching for measuring tools with better accuracy and greater capabilities. Eventually, PM purchased the ScanArm coordinate measuring machine because of its portability, flexibility, accuracy and compact design.
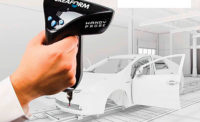
Made by FARO Technologies Inc., the ScanArm features a handheld laser scanner (with built-in software) designed for both contact and noncontact applications. Its hard and laser-line probes digitize interchangeably without having to remove either component. This enables PM engineers to accurately measure prismatic features with the hard probe, then laser scan sections requiring larger volumes of data.
“Once you get something like this, you can’t see how you did without it,” says Gary Pratt, co-founder of PM. “We use it to design, construct and analyze virtual components, computational fluid dynamics systems and complete cars. [It helps] every facet of a project, from initial conception to the finished product.”
“[ScanArm] is incredibly useful with our tight timeframes,” adds Gary Latham, a lead engineer at PM. “About 30 to 40 percent of our parts are manufactured in the workshop, and they need to be entered into CAD. Now we do that easily with faster data capture.”
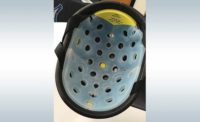
PM uses the scanner to quickly reverse engineer complex parts and surfaces into digital computer models. The ScanArm also enables easy, noncontact inspection of soft and deformable shapes, as well as rapid prototyping and 3D modeling.
“It feels like having your own pit crew,” concludes Mike Kurylo, a design engineer at PM.
For more information on portable coordinate measuring machines, call 800-736-0234 or visit www.faro.com.


