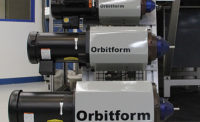
Orbitform knows the importance of the bottom line, and how imperative it is to keep things running smoothly and efficiently. We are a huge advocate of keeping things simple, especially when it comes to the performance of our powerheads and the parts that keep them running strong. We understand that many of our customers have one machine to run multiple parts. With that in mind our powerheads can be fully serviced in a matter of minutes to a couple of hours, not days or weeks. A great example of this is our 14 step process to assemble the powerhead spindle.
Assembling the M-750A Spindle
Average time to complete: 30 minutes
01. Grease all four angular contact bearings.
02. Flip bearings over and add grease between each ball.
03. Fill the cavity of the metallic seal with grease. Make sure that the inside edge has grease on it.
04. Place bearings into a heater for about 10 minutes.
05. While waiting for the bearings to heat, insert a drive key into the spindle.
06. Secure the drive key with screws and 242 blue Loctite.
07. Place the metallic seal onto the spindle.
08. Screw the spindle into the assembly fixture, lock into position.
09. Place the first three bearings (wide surface down) onto the spindle.
10. Place the fourth bearing (narrow surface down) onto the spindle.
11. Place a bearing spacer onto the spindle.
12. Place a radial bearing on top of the bearing spacer.
13. Place a locknut onto the spindle.
14. Torque the locknut down to 300 foot pounds.
A complete step-by-step video can be found on our website, under the machines tab–https://www.orbitform.com/videos
Permanently assembling parts using an orbital process offers many advantages, including: 80% less force required than a conventional press;, a low profile, aesthetically appealing head-form; low cost fasteners; a high strength joint; and the ability to allow a joint to articulate after forming.
Proper machine setup and maintenance is critical in achieving a desirable head form and consistent results. Over the last 30 years, Orbitform’s engineers have designed an orbital head that is easy to assemble and change out.
Assembling the HS-310 Orbital Head
Average time to complete: 15 minutes
01. Place small bearing in the bottom of the housing. Use a bearing driver or keystock to secure it in place.
02. Prepare the thrust bearing. One will have an unfinished inner diameter. The other will have a finished inner diameter. Place the bearing with the unfinished inner diameter in the housing first.
03. Place a bead of grease around the race of the bearing.
04. Place a bead of grease between the balls of the ball bearing. Then place ball side down in the housing.
05. Place a bead of grease around the race of the remaining bearing and place grease side down in the housing.
06. Insert the peen holder into the housing.
07. Apply 242 blue Loctite to the grease fitting and insert it until it is flush or below the outside of the housing.
08. While holding the peen holder down and rotating it, insert grease into the grease fitting.
09. Place the top bearing into the housing. Use tooling to sink into housing.
10. Insert retaining ring to hold the parts in the housing.
11. Insert an oval point set screw into the peen holder to hold the peen.
A complete step-by-step video can be found on our website, under the machines tab–https://www.orbitform.com/videos
Orbitform
1600 executive Drive
Jackson, MI 49203
(517) 787-9447


