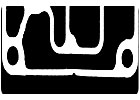
The sealing surfaces on a transmission manifold must be free of defects that would allow pressurized hydraulic fluid to leak. A machine vision system readily finds such defects at production speeds, as this polarized image indicates. Photo courtesy Epstein Associates
Myriad engine assemblies are inspected with machine vision, including fuel injectors, intake valves, exhaust valves, cylinder blocks, camshafts and spark plugs. For example, Automated Vision LLC (Madison, WI) has devised a fully automatic system for inspecting piston heads. The system checks each assembly for missing, misoriented and damaged components. It also inspects the coating and finish on the skirt and other parts. Pistons enter the system on a pallet-transfer conveyor. Next, a gripper lifts the piston off the pallet and rotates it, enabling three cameras to inspect different attributes of the piston simultaneously. Pistons that make the grade are returned to the pallet and transported to the next assembly station. Pistons that fail are transferred to a reject conveyor. The entire process takes 3.1 seconds.
Many interior components are also inspected by machine vision. For example, PPT Vision Inc. (Eden Prairie, MN) has created a semiautomatic system to inspect faceplates for car stereos. The system inspects the quality of the text and logos printed on the panel, dials and buttons. It also verifies a small identification code located at the top right corner of the plate. The application requires a high-resolution camera because of the small size of the print and the relatively large size of the area to be inspected. When a faceplate is loaded into the cell, a bar code reader scans the identification code and tells the vision system what model of faceplate it’s looking at. Special diffused lighting provides even illumination over the curved surface of the part.
Some automotive assemblers use machine vision for inspection because people would be too slow or too unreliable for the task. In other cases, machine vision is the only way some automotive components can be inspected.
For example, one supplier uses a vision system from Vision Components (Hudson, NH) to examine fuel filters. The fine mesh inside each filter must be checked for quality. However, since the filter is just 1 inch wide, it’s impossible for a person to do the job. In the automated system, the filters sit upright on a translucent conveyor belt, which moves past the camera. The conveyor is lit from below, so light shines through the filter and creates a silhouette of the mesh. If the camera detects a mesh size outside a given tolerance range, it signals a programmable logic controller, and the faulty filter is rejected.
On the opposite end of the spectrum, machine vision can also be used to inspect large assemblies, such as bumpers, hoods, grills, radiators, doors and air conditioners.
For example, one supplier uses a vision system from Cognex Corp. (Natick, MA) to inspect cross-car beams. Each beam is 5.6 feet long and fits across the vehicle at the front of the driver’s compartment. Besides providing lateral strength to the chassis, it supports the dashboard, instrument panel and glove compartment. The beam is made by bending a steel tube on a CNC machine. Brackets and studs are welded to the beam with automated equipment, and clips for attaching the instrument panel are installed manually.
Next, the beam is placed in a fixture, and a six-axis robot equipped with a vision system measures 22 points on the assembly against dimensional tolerances. The vision system also ensures that all the studs and brackets are present. Every 40 beams, the robot performs a more thorough inspection, checking 49 points instead of 22. If the beam is acceptable, it is marked with ink and a label is automatically printed listing the beam’s serial number, the date of manufacture, and the cell that welded the brackets. The system can inspect 40 beams per hour.


