Follow-up is rarely fun, but it is often necessary to verify an assembly process. The most important follow-up to threaded-fastener installation is a static torque audit. Depending on the application, a static torque audit may be performed a few minutes or several hours after a fastener is installed.
“A torque audit measures residual torque, which is the amount of tension that remains in the joint after it has been fastened,” says Brad Mountz, president of Mountz Inc. “It’s the best way to confirm that you’ve installed the fastener as intended. And it assures that you’ve achieved the torque specification for the fastener.”
Torque auditing prevents over- or undertorquing fasteners and detects missing fasteners. It also validates the fastening process, the torque tool, the product design and the materials used for the application.
Big manufacturers, like The Boeing Co., are big on torque auditing and have been for decades. Several years ago, Boeing’s Satellite Development Center (SDC) in El Segundo, CA, implemented a point-of-use torque auditing program to prevent over- and undertorquing of bolts.
SDC is the world’s largest satellite manufacturer. As part of its quality control program, SDC must comply with ANSI/NCSL Z540-1-1994 calibration standards. These standards require the company to use a torque-verification system that maintains the historical data of each run-down and tool calibration.
Initially, SDC had several quality-control people manually monitor all bolt-torquing processes. But, this approach was subject to human error and required thousands of tools to be annually calibrated by a third party. In addition, torque values on certain tools could not be changed quickly enough during production, so the company was forced to use tools exclusively for specific-torque-value applications.
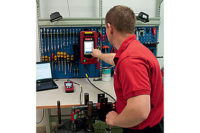
After considering several options, SDC implemented a new torque auditing system in 2007. This system features a variety of Mountz specialty torque wrenches and screwdrivers, 27 BMX torque sensors and 12 PDA-based, Wizard Plus handheld torque analyzers.
The software in the analyzer validates the tool’s calibrated torque setting prior to use, ensuring that each bolt is tightened to the correct level. In addition, the system requires annual calibration of the sensors and PDA analyzers only, resulting in extensive time and cost savings for Boeing.
45-Year Focus on Accuracy
Torque auditing has been around as long as threaded fasteners. What’s changed is the measurement method to determine torque accuracy. From the Industrial Revolution through the mid-1960s, the torque audit, so to speak, consisted of a person using a hand or impact wrench to check the tightness of each fastener on a product before it was shipped to the customer.
That all changed in 1966 with the passage of the National Traffic and Motor Vehicle Safety Act. This federal law created the National Highway Traffic Safety Administration that develops Federal Motor Vehicle Safety Standards (FMVSS). In 1967, FMVSS 209, the first regulation, was adopted, and it established fastening requirements for seat belt assemblies.
“Initially, torque auditing was a guy using a dial or click wrench and writing down data on a clipboard,” recalls Frank Skog, a product manager for ASI Datamyte Inc. Skog has more than 30 years experience working on torque-measurement systems for the U.S. auto industry. “Because this manual approach hurt production, the Big Three automakers began using electronic torque wrenches.”
Throughout the 1970s and early 1980s, these wrenches became much more accurate. By the late 1980s, electronic wrenches and screwdrivers featured built-in transducers that measured peak and residual torque. Initially, this data was transferred over a cable to a computer. By the 1990s, data could be sent (via cable) to a portable analyzer.
Today, these types of tools are able to record several measurements of torque. Some wrenches can even measure torque regardless of the tool’s orientation. Others provide a visual, audible or sensory signal (vibrating handle) once the preset torque is reached.
Tighten but Verify
There are two ways to perform a static torque audit, according to Mountz. The standard method is known as first movement or breakaway. Using an analog or digital measuring tool, an auditor slowly applies force in the tightening direction until the first movement of the fastener (usually about 3 degrees) is noted. The recorded reading is a fairly accurate measurement of the residual torque in the joint.
A second method, used often in Japan, is called the loosening test. This method is basically the breakaway method in reverse, as torque is applied in the direction that loosens the fastener. The torque value recorded is the approximate torque that was applied to the joint.
“We believe the loosening test is not as reliable as the breakaway method,” says Mountz. “Customers that like the method say it’s easier and more consistent. But our view is that it is less consistent than the breakaway method.”
Torque auditing detects fastener relaxation, which occurs to some extent in all fastened joints. For correctly designed joints, relaxation is small and can be virtually ignored. Relaxation in safety-critical joints, however, must always be corrected.
“Audit frequency always depends on the product being assembled,” says Russ Hughes, product marketing manager for Desoutter Industrial Tools. “Fasteners in safety-critical joints are always audited more often than, say, screws in a portable radio.”
Automakers will often have an auditor check a specific safety-critical fastener—for example, the bolt on the right-front axle—on several vehicles in a row as they come down the assembly line, notes Skog. This is done periodically during each shift on different batches of vehicles to not only verify that the fastener was torqued within spec, but also to make sure the plant’s assemblers and fastener-installation process are reliable.
“Simply because a power tool tightens to programmed settings is not proof that resultant joints have proper clamp force,” notes Skog.
Akira Morita, president of IMADA Inc., suggests manufacturers pay close attention to three factors that can cause joint relaxation and increase the need for torque auditing. These include the temperature in and around a joint, the presence of lubricants, and multiple layers and materials used in the joint.
“Painting can cause joint relaxation,” claims Mountz. “A boat engine manufacturer customer was getting complaints about loose bolts in their engine head gaskets. It turned out that the heat generated while painting the engines caused some slight bolt relaxation. So the company now performs torque audits before and after the paint has dried.”
Noisy factory floors do not cause joint relaxation, but they can distract an auditor. Aware of this, Mountz last year developed the MTWD digital torque wrench that provides a visual, audible and sensory signal when the preset torque is reached.
The operator presets lower and upper torque thresholds and applies force until a green LED illuminates and the handle vibrates. The wrench clearly displays real-time digital torque readings in one of four units of measurement: newton-meters, kilogram-meters, ft-lbs or in-lbs.
“Auditing isn’t cheap, so never disregard any auditing results,” recommends Phil Klinger, division product manager for ASG, Div. of Jergens Inc. “The results might show that three auditors get three different torque readings on the same type of fastener, or that one or more tools cannot install fasteners to required specifications. So be prepared to invest in properly training auditors to minimize differences in audit results or buying better tools.”
Several electronic torque wrenches record multiple types of data during auditing. The LightStar series, when used in conjunction with ASI DataMyte data collectors and software, captures angle restart, angle breakaway and torque at angle. Angle restart measures torque at the instant the fastener starts retightening after overcoming static friction. Angle breakaway captures the torque needed to set a fastener in motion. Torque at angle measures torque at a user-defined amount of detected rotation (two degrees, for example) past a torque threshold.
Another wrench that captures torque and angle data is the DTW made by ASG. The tool enables auditors to perform torque auditing with a simple turn requiring very little force. Operator fatigue is reduced, making the wrench ideal for high-production applications.
It has a torque capability from 1 to 2,000 newton-meters. Data is stored in the tool and can be output to a PC via cable or a wireless module, allowing detailed analysis in Excel.
Manufacturers also need to establish efficient routes for each auditor. Skog points out that automakers tend to have each auditor cover a few assembly stations and work within a few feet of assemblers. Klinger says that many Tier 1 manufacturers do likewise. Torque auditing is required on all critical and warrantied fasteners during each shift.
Fastener Challenges
In general, noncritical fasteners do not need to be torque audited. Rather, an auditor will perform visual inspection to make sure these fasteners are installed. Noncritical fasteners tend to be screws of all sizes, nonmetal screws and screws installed in nonmetal surfaces.
However, some screws are critical fasteners, and they can be difficult to torque audit without the correct tool. An electronic or manual wrench or screwdriver can be used, but must be fitted with a socket or bit that fits very snugly over or in the head. This is especially critical for slotted screws. Also, the tool’s internal or external transducer or sensor must be able to measure torque in either kilogram-meters, kilogram-centimeters, in-ozs or in-lbs.
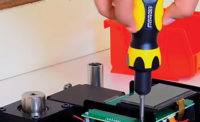
“The best way to audit tiny screws in computers and electronic circuit boards is to use a transducerized manual screwdriver,” says Klinger. “These screws are similar in size to those used in eyeglasses.
Auditing must be done very carefully. Just 1 in-lb of torque will strip them.”
The ASG-D series of mini digital screwdrivers is good for these applications. Torque range across the series is 0.5 to 40 kilogram-centimeters and 0.05 to 4 newton-meters. The tools feature a 0.25-inch hex drive and autolock bit holder, and are accurate to within ±2.5 percent.
Auditing critical fasteners made of plastic can also be challenging. Morita says many auditors shouldn’t use the standard breakaway test with plastic fasteners. This is because it is extremely difficult for any auditor, including those that are skilled and well-experienced, to understand peak down torque.
Peak down torque is the force required so the threads start to break free. Torque then dips briefly before climbing to its peak. To obtain a more accurate torque measurement, especially with small plastic fasteners, Morita recommends auditors use a specialized breakaway torque tester.
IMADA’s DI-12 motorized breakaway torque tester captures peak down, peak and yield torque of screws during auditing. It turns the screw at a consistent speed, applies continuously increasing torque and helps the auditor visually determine the breakaway point. By unifying these three actions, the tool enables an auditor to perform the breakaway test without overtorquing. The DI-12 automatically displays torque values on an LED panel.
“All auditing requires a trained auditor using the right tool,” concludes Mountz. “However, the use of accurate fastening tools doesn’t eliminate the need for a torque audit. Just like computer entry of sales numbers doesn’t eliminate the need for a financial audit."
For more information on torque auditing, visit www.assemblymag.com to read these articles:


