Headquartered in Bartlett, IL, a western suburb of Chicago, Matrix Industrial Automation designs and builds robust industrial automation systems. Founded in 2000, the company is an authorized FANUC systems integrator and has built systems for myriad industries, including aerospace, automotive, medical and consumer products.
Often, these systems pair turnkey automation with the latest vision technologies. By using automated inspection, the systems ensure that manufacturers realize the highest efficiency and greatest precision in production.
One Matrix customer produces valve assemblies designed to regulate the flow of gasoline into a carburetor. The assembly consists of two parts: a valve body, which the manufacturer produces, and a specialized rubber tip designed to withstand contact with fuel, which is produced by a third party.
The manufacturer approached Matrix to design an automated system to assemble the parts and inspect them for accuracy. The customer’s existing production process used a manual gauge to measure assemblies during random inspections. This was especially challenging because each assembly is slightly more than 0.5 inch long. The manufacturer wanted a more reliable, less time-consuming approach to quality control.
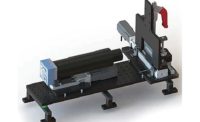
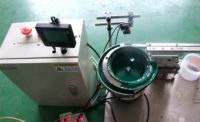
“Our goal was to design a comprehensive system that seamlessly combined assembly with inspection,” explains Pascal Agneray, the Matrix mechanical engineer who conceptualized the system. “In the automated system we built, valve bodies move along a gravity track to a small, servo-driven dial, which feeds them onto a larger, eight-station main dial. On this dial, each valve body is held in place by a set of cam-operated jaws. The rubber tips move in a similar manner to a second servo-driven, singulating mechanism that grabs each tip, then pushes and rotates it onto the top of the valve body.
“The main dial operates in a fast indexing motion via reducer and servomotor setup, so once each valve body and rubber tip is assembled, it moves in view of two cameras, which capture images of the assembly to be analyzed for height, alignment, concentricity and run-out. The entire cycle takes just 1.5 seconds with tens of thousands of parts assembled and inspected each day.”
Inspection System
The inspection system incorporates two Teledyne DALSA Genie Nano M4020 cameras that offer a resolution of 4,112 by 3,008 pixels and image capture rates of up to 20 frames per second. With a small form factor that allows them to be placed even in confined spaces, the two cameras are positioned at right angles to allow for images of the valve assembly from two sides.
As each object crosses the field of view, the cameras are triggered automatically. Embedded iNspect Express software assesses each image to ensure that all measurements meet critical dimension standards and are within a tolerance of 0.08 millimeter. At the same time, the software analyzes each image for irregularities in the assembly itself, such as deformities in the valve or rubber tip, which may have occurred in earlier phases of production.
Statistical inspection data is sent through an interface to the PLC. After the main dial rotates past the cameras, assembled parts that pass inspection are sent down a chute to a container. Any parts that don’t meet customer standards are ejected through a vacuum and discarded.
“We chose Teledyne DALSA’s Genie Nano camera because it provides the high frame rates and resolution needed for this application,” Agneray continues. “With a tight tolerance of 0.08 millimeter, we wanted high resolution and superior image quality to ensure the greatest possible accuracy, and the Genie Nano delivers a 9 megapixel resolution, far better than the 3 megapixels offered by a competitive system.”
The embedded iNspect Express software is essential to the performance of the camera system, ensuring that each image is evaluated quickly.
“This was our first experience with a system from Teledyne DALSA,” explains Kameron Zulfic, the Matrix application engineer who developed the controls and programming for the project. “The entire vision system was easy to configure and deploy. We were able to use the standard tools within iNspect to get the data we needed from the start and then used the software’s scripting function to customize.
“Providing our customer with a system that was user-friendly and intuitive to operate was important; we wanted to ensure that the software was easy for the customer to navigate once installation was complete.”
iNspect Express software delivers the performance and versatility needed to meet a range of manufacturing requirements, in all types of environments. Plus, the software’s advanced features ensure precise measurements, as well as robotic guidance, flaw detection, code reading and color verification.
2“The complete system has been deployed at the customer site for several months, and our customer has been very satisfied with assembly and inspection quality,” Agneray concludes. “In fact, the customer is now considering enhancing the current design with an additional camera system to inspect each valve assembly from above using a specialized lens. Their goal is to identify possible flaws in the rubber tip that are difficult to detect in images captured from the sides.”
For more information on automated assembly systems, click https://matrixdesignllc.com.
For more information on vision systems, click www.teledynedalsa.com.


