Appliance Assembly: Automation System Sucks It Up
When German appliance manufacturer Vorwerk designed a state-of-the-art vacuum cleaner, it needed a state-of-the-art automation system to assemble it.
Sneezing and coughing after getting up in the morning, teary eyes, runny nose or headaches can indicate an allergy to house dust mites.
According the National Institutes of Environmental Health Sciences, 27 percent of Americans are sensitive enough to dust mites to experience mild allergic symptoms. For some people, dust mite allergens cause severe symptoms. The American College of Allergy, Asthma, and Immunology estimates that as many as 90 percent of people with allergic asthma are sensitive to dust mites, and at least 45 percent of young people with asthma are allergic to dust mites. Dust mites are found in every household. They thrive in humid, warm climates and feel especially at home in mattresses, bed linen, carpets and upholstery.
It’s not the mites themselves that cause illness, but their droppings, which disintegrate into minute particles that end up in the ambient air.
The most important tool for managing house dust mites is a good vacuum cleaner. But not all vacuum cleaners are the same. Every vacuum sucks up dust, but many release some of that dust back out through the exhaust air.
The engineers at Vorwerk & Co. believe that what goes into a vacuum should stay in the vacuum. Based in Wuppertal, Germany, Vorwerk manufactures vacuums, blenders and other products.
The company’s new Kobold 140 vacuum cleaner “swallows” 99.9 percent of all vacuumed dust thanks to a unique new bag that filters the air as it collects dust. “Up to now, profound cleanliness could only be achieved with multiple, different filters in an appliance,” says Michael Weber, manager of corporate communications at Vorwerk. “Changing the filters was cumbersome and often neglected. By replacing the full dust bag with a new one, three filters are replaced in a wink by a single step. It’s handy, simple and yet perfectly effective.”
The filter bag performs three tasks. The prefilter layer traps large particles. Beads in the inner layers of the bag absorb bad odors. Finally, a HEPA filter retains 99.9 percent of allergy-causing household dust.
Replacing the old dust bag with a new one is simple and clean. The flap of the filter unit is opened, the full bag is removed, and the new one is inserted. In the process, the dust remains where it should be-in the dust bag. The snap-lock closure ensures it is fully sealed.
“Whatever is inside does not get out again,” says Weber. “Even an allergic person can replace the dust bag without coming into contact with harmful allergens. Incidentally, the exhaust air of the Kobold 140 is 1,000 times cleaner than normal air.”
Besides the filter bag, Vorwerk engineers came up with a new overall design and motor for the Kobold 140. Weighing just 4 kilograms, the vacuum has a universal joint at the connector of the brush, enabling it get into every corner. Equipped with a telescopic handle that can completely disappear into the appliance after use, the vacuum can be adapted to the height of the user and stowed away in small cupboards.
The vacuum’s motor is situated in the top of the housing. During vacuuming, air is drawn in at the bottom and then passes through the filter bag, directly into the upper portion of the unit, where it is then exhausted. Thanks to the direct air path, the small, low-power drive operates efficiently: the vacuum only requires 900-watt power and yet achieves 60,000 rpm.
“The motor is smaller and 45 percent lighter in comparison to previous models,” says Weber.
“In comparison to system integrators that have to buy certain core components, DEPRAG offers all technical solutions in-house,” says Carsten Hollatz, purchasing manager of Vorwerk. “This is a big advantage to us, because assembly automation is very service-intensive. In case of service requirements, we need a partner who takes overall responsibility and competently assists us.”
DEPRAG designed and built two machines for Vorwerk. One machine automatically installs screws to join the upper and lower shells of the vacuum cleaner housing, which contains the motor and the bellows for the dust bag. The other assembles the telescopic handle. It also checks all preceding assembly steps. Together, these two machines enable Vorwerk to assemble 1,600 Kobold 140 vacuum cleaners in a single shift.
The automated system for the vacuum cleaner housing performs some tasks successively and others simultaneously. Initially, the preassembled module (the upper and lower shells) is automatically transported on a conveyor from the right of the starting position. When the start signal is activated, a lifter takes the part, which is now held horizontally by two sliders, from the conveyor. The sliders are furnished with flexible, spring-loaded pins, which accommodate tolerances and distortions in the plastic parts. The mechanism holds the module securely without scratching it. A retainer presses and holds the housing in a fixture.
Sensors in the fixture ensure that the module has been loaded correctly, keying on the shape of the ribs in the housing. Next, the machine establishes whether the preassembled bellows for the dust bag is present using a depth probe. At the same time, the air tightness of the bellows is checked with a vacuum test. If the bellows is not airtight, the module is automatically discharged and transported to a repair station.
Sensors also check for the presence of the cable hook for coiling the electrical cord. If these checks are successful, the screwdriving spindles are deployed. Because of space limitations, the spindles are located below the workpiece holder and raised at the start of the screwdriving process.
The machine is equipped with ten spindles. One of them, however, isn’t used to drive a screw. Instead, it’s used as a rotary actuator to check the action of the vacuum’s adjustable power switch. A stationary MINIMAT angle-head screwdriving spindle turns the switch counterclockwise to position 3. The spindle automatically switches off when 1 newton-meter has been reached. If position 3 is not reached, the module is discharged to the repair station.
As the switch is being tested, nine inline MINIMAT-C screwdriving spindles simultaneously install two different screws to a torque of 1 newton-meter. Three screws are B3.5 x 15.5 millimeters, and six are B3.5 x 40 millimeters. The spindles are arranged to save space in the confined area.
Torque is measured with the strain gauge bar, which is integrated into each spindle. Depth probes offer additional process control. If the parts are not fastened correctly, the assembly is sent to the repair station.
Once the screws have been installed, the retainer and screwdriving spindles return to their starting positions, and the lifter takes the housing back to the conveyor, which transports it out of the system to the left. During this time, the next nine fasteners are fed to the spindles with standard DEPRAG screwfeeding machines. Both and single and dual vibratory bowls are used. The screws are singulated and then shot directly to the nosepiece of each spindle through feed hoses.
The repair station is integrated into the assembly line via conveyor. If the system rejects a module, an assembler decides whether rework is possible. If not, the module is rejected as scrap. If it can be reworked, the assembler uses a screwdriver with a built-in torque sensor. The rework station will not release the assembly unless every fastener has been installed at the correct torque.
When the machine is actuated, the handle is held with various clamping devices. Seventeen pneumatic cylinders are used in the system. The cylinders ensure that the module is held securely without being deformed. Tensioning cylinders at the tip and the middle of the handle ensure it is positioned reliably. At the left of the assembly system, a stopper holds the handle in its position. This stopper is multitalented-it will be used later on for tension tests on the handle. A workpiece interlock ensures that the module can only be removed again once all assembly steps have been completed.
The first test process checks whether the switch is actually in position 0. If not, the assembly system stops with an error message and the problem is corrected.
If the switch is in the correct position, the machine proceeds with the next step. A test pin slides into the handle and tests the interior: Are the members inside the handle grip positioned correctly, relative to the switch? In this way, errors from previous assembly processes can be identified and eliminated. The handgrip is then attached to the handle tube.
A test pin attached to a hydraulic cylinder now moves the sliding switch on the handle from position 0 (vacuum off) to position 3 (maximum power). The fully assembled vacuum cleaner must leave the factory with this setting, which was also set on the housing. At this point, an additional test is performed: The handle is positioned at a predefined tilt angle.
If the handle passes all these tests, it can continue to the next station, where the cable hook is fastened to the handle. The screws are automatically supplied by a Series 5 screwfeeder. A MINIMAT-C inline screwdriving spindle drives the screws into the cable hook to a specified depth. At the same time, the system checks that the handgrip cap has been correctly attached. A test pin on the stopper is extended and pulls against a “nose” provided for this purpose. This tensile test establishes whether the handle tube is attached securely and whether the grip is seated positively.
The cable hook is now turned 30 degrees, which ensures that it has been correctly attached for subsequent packaging. At the end of the assembly process, a heated embossing tool furnishes each module with a manufacturing identification number. In this way, it can be traced for quality management purposes.
Sneezing and coughing after getting up in the morning, teary eyes, runny nose or headaches can indicate an allergy to house dust mites.
According the National Institutes of Environmental Health Sciences, 27 percent of Americans are sensitive enough to dust mites to experience mild allergic symptoms. For some people, dust mite allergens cause severe symptoms. The American College of Allergy, Asthma, and Immunology estimates that as many as 90 percent of people with allergic asthma are sensitive to dust mites, and at least 45 percent of young people with asthma are allergic to dust mites. Dust mites are found in every household. They thrive in humid, warm climates and feel especially at home in mattresses, bed linen, carpets and upholstery.
It’s not the mites themselves that cause illness, but their droppings, which disintegrate into minute particles that end up in the ambient air.
The most important tool for managing house dust mites is a good vacuum cleaner. But not all vacuum cleaners are the same. Every vacuum sucks up dust, but many release some of that dust back out through the exhaust air.
The engineers at Vorwerk & Co. believe that what goes into a vacuum should stay in the vacuum. Based in Wuppertal, Germany, Vorwerk manufactures vacuums, blenders and other products.
The company’s new Kobold 140 vacuum cleaner “swallows” 99.9 percent of all vacuumed dust thanks to a unique new bag that filters the air as it collects dust. “Up to now, profound cleanliness could only be achieved with multiple, different filters in an appliance,” says Michael Weber, manager of corporate communications at Vorwerk. “Changing the filters was cumbersome and often neglected. By replacing the full dust bag with a new one, three filters are replaced in a wink by a single step. It’s handy, simple and yet perfectly effective.”
The filter bag performs three tasks. The prefilter layer traps large particles. Beads in the inner layers of the bag absorb bad odors. Finally, a HEPA filter retains 99.9 percent of allergy-causing household dust.
Replacing the old dust bag with a new one is simple and clean. The flap of the filter unit is opened, the full bag is removed, and the new one is inserted. In the process, the dust remains where it should be-in the dust bag. The snap-lock closure ensures it is fully sealed.
“Whatever is inside does not get out again,” says Weber. “Even an allergic person can replace the dust bag without coming into contact with harmful allergens. Incidentally, the exhaust air of the Kobold 140 is 1,000 times cleaner than normal air.”
Besides the filter bag, Vorwerk engineers came up with a new overall design and motor for the Kobold 140. Weighing just 4 kilograms, the vacuum has a universal joint at the connector of the brush, enabling it get into every corner. Equipped with a telescopic handle that can completely disappear into the appliance after use, the vacuum can be adapted to the height of the user and stowed away in small cupboards.
The vacuum’s motor is situated in the top of the housing. During vacuuming, air is drawn in at the bottom and then passes through the filter bag, directly into the upper portion of the unit, where it is then exhausted. Thanks to the direct air path, the small, low-power drive operates efficiently: the vacuum only requires 900-watt power and yet achieves 60,000 rpm.
“The motor is smaller and 45 percent lighter in comparison to previous models,” says Weber.
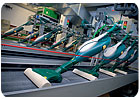
This machine automatically installs screws to join the upper and lower shells of the vacuum cleaner housing. Photo courtesy DEPRAG Schulz GmbH & Co.
Automatic Screwdriving
To produce its state-of-the-art vacuum, Vorwerk wanted a state-of-the-art assembly and test system. DEPRAG Schulz GmbH & Co.-the parent company of DEPRAG Inc. in Lewisville, TX-got the job.“In comparison to system integrators that have to buy certain core components, DEPRAG offers all technical solutions in-house,” says Carsten Hollatz, purchasing manager of Vorwerk. “This is a big advantage to us, because assembly automation is very service-intensive. In case of service requirements, we need a partner who takes overall responsibility and competently assists us.”
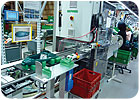
DEPRAG designed and built two machines for Vorwerk. One machine automatically installs screws to join the upper and lower shells of the vacuum cleaner housing, which contains the motor and the bellows for the dust bag. The other assembles the telescopic handle. It also checks all preceding assembly steps. Together, these two machines enable Vorwerk to assemble 1,600 Kobold 140 vacuum cleaners in a single shift.
The automated system for the vacuum cleaner housing performs some tasks successively and others simultaneously. Initially, the preassembled module (the upper and lower shells) is automatically transported on a conveyor from the right of the starting position. When the start signal is activated, a lifter takes the part, which is now held horizontally by two sliders, from the conveyor. The sliders are furnished with flexible, spring-loaded pins, which accommodate tolerances and distortions in the plastic parts. The mechanism holds the module securely without scratching it. A retainer presses and holds the housing in a fixture.
Sensors in the fixture ensure that the module has been loaded correctly, keying on the shape of the ribs in the housing. Next, the machine establishes whether the preassembled bellows for the dust bag is present using a depth probe. At the same time, the air tightness of the bellows is checked with a vacuum test. If the bellows is not airtight, the module is automatically discharged and transported to a repair station.
Sensors also check for the presence of the cable hook for coiling the electrical cord. If these checks are successful, the screwdriving spindles are deployed. Because of space limitations, the spindles are located below the workpiece holder and raised at the start of the screwdriving process.
The machine is equipped with ten spindles. One of them, however, isn’t used to drive a screw. Instead, it’s used as a rotary actuator to check the action of the vacuum’s adjustable power switch. A stationary MINIMAT angle-head screwdriving spindle turns the switch counterclockwise to position 3. The spindle automatically switches off when 1 newton-meter has been reached. If position 3 is not reached, the module is discharged to the repair station.
As the switch is being tested, nine inline MINIMAT-C screwdriving spindles simultaneously install two different screws to a torque of 1 newton-meter. Three screws are B3.5 x 15.5 millimeters, and six are B3.5 x 40 millimeters. The spindles are arranged to save space in the confined area.
Torque is measured with the strain gauge bar, which is integrated into each spindle. Depth probes offer additional process control. If the parts are not fastened correctly, the assembly is sent to the repair station.
Once the screws have been installed, the retainer and screwdriving spindles return to their starting positions, and the lifter takes the housing back to the conveyor, which transports it out of the system to the left. During this time, the next nine fasteners are fed to the spindles with standard DEPRAG screwfeeding machines. Both and single and dual vibratory bowls are used. The screws are singulated and then shot directly to the nosepiece of each spindle through feed hoses.
The repair station is integrated into the assembly line via conveyor. If the system rejects a module, an assembler decides whether rework is possible. If not, the module is rejected as scrap. If it can be reworked, the assembler uses a screwdriver with a built-in torque sensor. The rework station will not release the assembly unless every fastener has been installed at the correct torque.
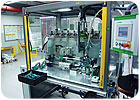
This machine fastens the handgrip to the vacuum’s telescopic handle. Photo courtesy DEPRAG Schulz GmbH & Co.
Getting a Handle on Assembly
At the next station, the telescopic handle is assembled. Before the machine is started, an operator manually attaches the cable hook to the handle. He then positions the entire handle in the system and inserts a spring. The sliding power switch on the handle is set to position 0.When the machine is actuated, the handle is held with various clamping devices. Seventeen pneumatic cylinders are used in the system. The cylinders ensure that the module is held securely without being deformed. Tensioning cylinders at the tip and the middle of the handle ensure it is positioned reliably. At the left of the assembly system, a stopper holds the handle in its position. This stopper is multitalented-it will be used later on for tension tests on the handle. A workpiece interlock ensures that the module can only be removed again once all assembly steps have been completed.
The first test process checks whether the switch is actually in position 0. If not, the assembly system stops with an error message and the problem is corrected.
If the switch is in the correct position, the machine proceeds with the next step. A test pin slides into the handle and tests the interior: Are the members inside the handle grip positioned correctly, relative to the switch? In this way, errors from previous assembly processes can be identified and eliminated. The handgrip is then attached to the handle tube.
A test pin attached to a hydraulic cylinder now moves the sliding switch on the handle from position 0 (vacuum off) to position 3 (maximum power). The fully assembled vacuum cleaner must leave the factory with this setting, which was also set on the housing. At this point, an additional test is performed: The handle is positioned at a predefined tilt angle.
If the handle passes all these tests, it can continue to the next station, where the cable hook is fastened to the handle. The screws are automatically supplied by a Series 5 screwfeeder. A MINIMAT-C inline screwdriving spindle drives the screws into the cable hook to a specified depth. At the same time, the system checks that the handgrip cap has been correctly attached. A test pin on the stopper is extended and pulls against a “nose” provided for this purpose. This tensile test establishes whether the handle tube is attached securely and whether the grip is seated positively.
The cable hook is now turned 30 degrees, which ensures that it has been correctly attached for subsequent packaging. At the end of the assembly process, a heated embossing tool furnishes each module with a manufacturing identification number. In this way, it can be traced for quality management purposes.
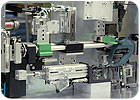
Pneumatic cylinders ensure that the handle module is held securely without being deformed. Photo courtesy DEPRAG Schulz GmbH & Co.
ASSEMBLY ONLINE
For more information on automatic screwdriving machines, visit www.assemblymag.com to read these articles
Looking for a reprint of this article?
From high-res PDFs to custom plaques, order your copy today!


